How to Download & Use IP Webcam for Android: Step-by-Step Guide
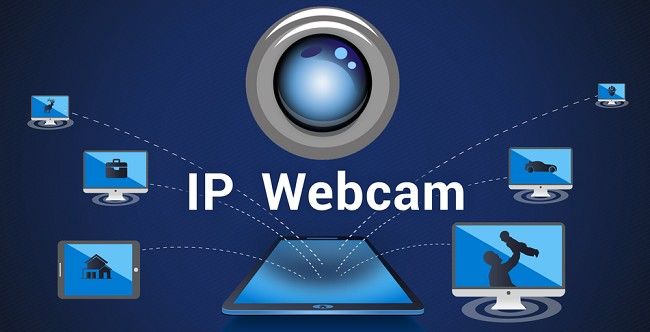
In today’s modern world, surveillance and monitoring systems are more accessible than ever. With just your smartphone, you can easily turn it into a high-quality network camera. One of the best tools available for this is the IP Webcam app for Android. The app transforms your Android device into a fully functional camera, capable of streaming video and audio to a computer, tablet, or even other smartphones.
In this article, we will guide you through the steps to download and use IP Webcam on your Android device, explain how to set up the app, explore its key features, and answer common questions.
What is IP Webcam for Android?
IP Webcam is a popular Android app that allows you to use your smartphone or tablet as a network camera. It streams video and audio from your Android device, making it an excellent solution for surveillance, monitoring your home, office, baby, pets, or even as a security camera. The app is capable of uploading footage to cloud storage services, offers multiple video formats for recording, and integrates seamlessly with third-party software.
With IP Webcam, you can access the live feed on any device with a web browser, VLC player, or compatible monitoring software. Whether you are using it for surveillance, video conferencing, or simple monitoring, IP Webcam is a versatile tool.
Why Use IP Webcam on Your Android Device?
There are several reasons why IP Webcam is a great choice for Android users:
Turn Your Phone into a Security Camera: With IP Webcam, you can easily convert your Android phone into a network camera that streams live video and audio.
Easy Setup: Setting up the app is simple, and you can start using it in minutes.
Customizable Features: The app provides a range of options for video quality, motion detection, and cloud storage integration.
Remote Access: You can view the camera feed remotely using Ivideon or simply through a local network.
Cost-Effective: The app is free to use, with an optional paid version that removes ads and adds extra features.
Whether you want to monitor your home, keep an eye on pets, or use it as a baby monitor, IP Webcam is a powerful tool you can carry in your pocket.
How to Download & Install IP Webcam for Android?
Downloading the IP Webcam app on your Android device is easy and straightforward. Just follow these simple steps to get started.
Step 1: Open the Google Play Store
To download IP Webcam, you first need to open the Google Play Store on your Android device. If you don’t have it installed, you can download it from the official app store.
Unlock Your Phone: Unlock your Android device and navigate to the home screen.
Search for Google Play Store: Tap on the Google Play Store app icon to open it.
Step 2: Search for IP Webcam
Once you are inside the Google Play Store, use the search bar at the top of the screen to look for the app.
Enter “IP Webcam” in the Search Bar: Type “IP Webcam” and press Enter or tap on the search icon.
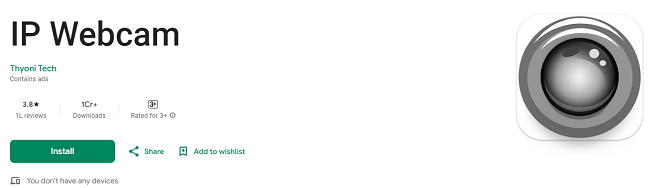
Find the App: The IP Webcam app should appear in the search results. Look for the app developed by "Paul Fabri" to ensure that you’re downloading the official version.
Tap on the App: Once you locate the app, tap on it to open the app’s details page.
Step 3: Install the App
To install IP Webcam on your Android device:
Tap on Install: You will see an "Install" button on the app's page. Tap it to begin the download process.
Wait for the Download: The app will start downloading and installing automatically. The time it takes to download depends on your internet connection speed.
Open the App: Once the installation is complete, you can tap “Open” to launch the app immediately, or you can find the app icon in your apps list.
How to Set Up IP Webcam on Your Android Device?
Now that IP Webcam is installed on your Android device, it’s time to configure it and start using it. Here’s how to set up the app:
Step 1: Launch the IP Webcam App
Open the App: Find the IP Webcam icon on your Android device and tap on it to launch the app.
Grant Permissions: The app will ask for permissions to access your camera and microphone. Make sure to grant the necessary permissions for the app to function correctly.
Step 2: Configure Camera Settings
Once the app is open, you can start configuring the camera settings:
Select Video Preferences: You can choose the resolution, frame rate, and quality of your video feed. Higher resolution and frame rates result in better video quality but may require more bandwidth.
Audio Settings: You can enable or disable audio streaming. IP Webcam supports various audio formats like WAV, Opus, and AAC. Choose the one that works best for your needs.
Video Orientation: You can adjust the orientation of the video feed (portrait or landscape), depending on how you want to monitor the feed.
Enable Motion Detection: IP Webcam offers motion detection, which is useful for surveillance. You can enable this feature and adjust its sensitivity.
Step 3: Start Streaming
Once you’ve configured the settings to your liking, it’s time to start streaming:
Start Server: In the app, tap on the “Start Server” button. The app will display the IP address and port number needed to access the camera feed.
View the Stream: To view the video feed, open a web browser on any device (like a computer or another smartphone) and enter the provided IP address followed by the port number (e.g., http://192.168.1.101:8080).
Step 4: Advanced Features
IP Webcam offers several advanced features that can enhance your experience:
Cloud Storage: IP Webcam can upload recorded videos to cloud storage services like Dropbox, FTP, or SFTP. You can enable this option in the settings.
Night Vision: If you’re using the app in low-light conditions, enable the night vision feature to get better visibility.
Sensor Data: IP Webcam allows you to monitor and graph sensor data (like battery level or temperature) via its online interface.
Tasker Integration: With the pro version of the app, you can integrate IP Webcam with Tasker, an automation app, to trigger specific actions based on camera activity.
How to Access IP Webcam Remotely
In addition to viewing the video feed on your local network, you can also access the camera feed remotely through the Ivideon cloud service. This requires setting up a free Ivideon account and linking it to your IP Webcam app.
Create an Ivideon Account: Go to the Ivideon website and sign up for a free account.
Link Ivideon to IP Webcam: In the IP Webcam app, go to the “Cloud Settings” and enter your Ivideon login credentials.
Access the Camera Feed Remotely: Once connected, you can view your camera feed from anywhere using the Ivideon app or website.
IP Webcam Features
IP Webcam offers a wide range of features that make it a popular choice for Android users. Some of the key features include:
Motion and Sound Detection: The app can detect movement or sound and send notifications to your device or cloud storage.
Video Recording: IP Webcam supports video recording in multiple formats (WebM, MOV, MKV, and MPEG4). You can record video locally or upload it to the cloud.
Video Chat Support: IP Webcam supports video chat using MJPEG, so you can use it for video calls on platforms that support MJPEG streaming.
Customizable Interface: The app allows you to customize the user interface for a personalized experience.
Troubleshooting Common Issues
If you encounter issues while using IP Webcam, here are some troubleshooting tips:
Camera Feed Not Showing: Make sure your Android device and the viewing device (like your computer or another phone) are connected to the same Wi-Fi network. Also, ensure that the IP address and port number are correct.
Audio Issues: Check your microphone settings and make sure audio streaming is enabled in the app. Also, verify that the microphone is not obstructed or muted.
Slow Streaming: If the video feed is lagging, try lowering the video resolution or frame rate in the settings. A slow internet connection can also cause delays.
Conclusion
IP Webcam is a powerful and versatile app that allows you to turn your Android device into a high-quality network camera. Whether you are using it for surveillance, monitoring your baby or pets, or simply streaming video, the app offers an easy-to-use interface and a variety of features.
By following the steps outlined above, you can easily download, install, and set up IP Webcam on your Android device. With its customizable settings, cloud integration, and motion detection capabilities, IP Webcam is a great solution for anyone looking to use their smartphone as a security camera or streaming device.
So, if you're ready to make the most of your Android device, download IP Webcam today and start exploring the possibilities!
Trending Now
Updates