How to Download & Set Up IP Webcam App – Complete Guide
In the digital age, security and surveillance are becoming increasingly important for both personal and business purposes. One of the most convenient ways to monitor your home, office, or property is by using your smartphone as a security camera. This is where the IP Webcam app comes in.
IP Webcam transforms your Android smartphone into a powerful IP camera, allowing you to stream video feeds and monitor your surroundings remotely. Whether you want to keep an eye on your home while you're away, monitor your pet, or set up a video surveillance system, this app provides a flexible and cost-effective solution.
In this guide, we will walk you through the entire process of downloading, installing, and setting up the IP Webcam app. We will also cover its key features and troubleshooting tips to help you get the most out of this powerful app.
What is IP Webcam?
IP Webcam is a free Android app that turns your smartphone into an IP camera. It allows you to stream video over the internet or your local network, making it easy to monitor your environment from anywhere. The app supports several advanced features such as motion detection, video recording, and integration with third-party services like IFTTT and Google Drive.
The app works by using the smartphone’s camera, microphone, and internet connection to transmit live video and audio feeds to a web browser or a dedicated viewing app. It's a popular choice for users looking to repurpose their old smartphones into useful security devices.
Key Features of IP Webcam:
Live Video Streaming: Stream live video feed to your computer or mobile device.
Motion Detection: Automatically start recording when movement is detected.
Audio Monitoring: Supports two-way audio monitoring for a more immersive experience.
Cloud Storage: Upload video recordings to cloud storage services like Google Drive.
Password Protection: Secure your camera feed with password protection.
Recording and Playback: Record videos for later viewing.
IP WebCam App - How to Download & Set Up on Your Device?
Step 1: Download the IP Webcam App
For Android Users
To download and install the IP Webcam app, follow these steps:
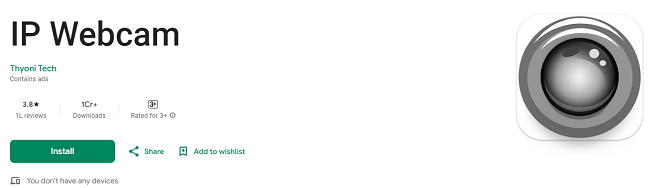
Open Google Play Store: Start by opening the Google Play Store on your Android device.
Search for IP Webcam: In the search bar, type "IP Webcam" and press enter. The official app should appear in the search results.
Install the App: Tap on the app to view its details, then press the Install button. The app is free to download, though some advanced features may require in-app purchases.
Wait for the Installation to Complete: After you tap Install, the app will automatically download and install onto your device. Once installed, the app icon will appear on your home screen or in the app drawer.
Open the App: After the installation is complete, open the app by tapping on the icon.
Tip: If you cannot find the app, make sure you are using an Android phone with version 4.0 or later, as this is required for the app to work properly.
For Windows and Mac Users
While the IP Webcam app is designed for Android, you can still access your webcam feed from a PC or Mac. Here's how to do it:
Download the IP Webcam App on Your Android Device.
Open the Web Interface: Once the app is installed and running on your Android device, you will see an IP address displayed on the screen. Type this address into your web browser on your PC or Mac.
Access Your Camera Feed: The web interface will allow you to view your camera feed, change settings, and control the app remotely.
Step 2: Set Up the IP Webcam App
Once the app is installed, it’s time to set it up. The initial setup involves configuring the video streaming options, security settings, and the network settings. Here’s how to do it:
1. Launch the IP Webcam App
After launching the app, you will be greeted with the main interface, which includes a variety of settings and options.
2. Configure Camera Settings
The first thing you need to do is configure the camera settings to match your needs. The app allows you to adjust various settings, such as:
Resolution: Choose the resolution of the video feed (higher resolutions provide better quality but require more bandwidth).
Frame Rate: Select the frame rate of the video stream (higher frame rates provide smoother video).
Video Orientation: Select the orientation of the video feed, especially if you're mounting the phone upside down or on a tripod.
Focus Mode: If your phone supports it, you can change the camera focus (auto or manual).
Once you’ve adjusted these settings, tap Save to confirm.
3. Enable Audio Settings (Optional)
IP Webcam also allows you to capture audio along with video. To enable audio monitoring:
Microphone Settings: Under the audio settings, you can enable the phone's microphone to capture sound. You may also have the option to configure audio quality settings.
Two-Way Audio: If you want to use two-way audio (talking through your device’s microphone), make sure that this option is enabled.
4. Choose Streaming Options
One of the best features of IP Webcam is the ability to stream video in multiple formats. In the settings menu, you can choose the output method. Common options include:
MJPEG: This is the most popular streaming method and can be viewed in a web browser.
RTSP: This streaming option is useful for integrating with professional surveillance systems.
FTP: You can upload captured video footage directly to an FTP server.
5. Enable Motion Detection (Optional)
If you want the app to automatically start recording when motion is detected, enable Motion Detection. You can adjust the sensitivity and set the area of the screen that should be monitored for motion. This feature helps you save storage and bandwidth by only recording when something moves in front of the camera.
6. Secure Your Camera Feed
Security is an important aspect of any surveillance system. IP Webcam allows you to set a username and password to protect access to your video feed.
To enable password protection:
Go to Settings > Authentication and enter your desired username and password.
This ensures that only authorized users can access your camera feed.
7. Configure Network Settings
If you want to access your camera feed remotely (over the internet), you’ll need to configure the network settings.
Wi-Fi Connection: Make sure your smartphone is connected to a Wi-Fi network for the best performance.
IP Address: The app will display an IP address that you can use to access the camera feed. If you're setting up remote access, note this IP address.
Port Forwarding: If you want to access the camera feed from outside your home network, you may need to configure port forwarding on your router. This step may be a bit technical, so refer to your router’s manual for specific instructions.
8. Start Streaming
Once all settings are configured, tap the Start Server button. This will activate the streaming and display the URL that you can use to view the camera feed. You can enter this URL into any web browser or use a compatible video player.
Step 3: Access the IP Webcam Feed
Accessing via Web Browser
Open your preferred web browser.
Type the IP address and port number displayed in the app. For example:
http://192.168.1.100:8080
You will be redirected to the IP Webcam live feed page where you can view the camera in real time.
Accessing via Third-Party Apps
If you want to access the camera feed on a different device or via a dedicated app, you can use third-party apps like VLC Media Player, TinyCam Monitor, or any other IP camera viewer that supports MJPEG, RTSP, or HTTP streams.
Troubleshooting Tips
While IP Webcam is relatively easy to set up, you may encounter some issues. Here are a few common troubleshooting tips:
1. Poor Video Quality
If the video quality is poor, try reducing the resolution and frame rate settings. Also, ensure that your internet connection is stable.
2. Camera Feed Is Not Accessible Remotely
If you’re unable to access the camera feed outside your home network, make sure that port forwarding is properly configured on your router. You can also check if your internet service provider blocks certain ports.
3. App Crashes or Freezes
If the app crashes or freezes, try restarting your phone and relaunching the app. If the problem persists, consider reinstalling the app.
4. No Audio
If you can’t hear audio, check that the microphone option is enabled and that your phone’s volume is turned up. Some devices may require permission to use the microphone, so make sure you have granted the necessary permissions.
Conclusion
The IP Webcam app is a fantastic tool for turning your Android smartphone into a security camera, offering a simple yet powerful solution for video surveillance. With its wide range of features, including motion detection, cloud storage, and live streaming, IP Webcam can meet the needs of both casual users and advanced security setups.
By following the steps outlined in this guide, you should be able to download, install, and set up the IP Webcam app with ease. Once your system is up and running, you can enjoy the peace of mind that comes with being able to monitor your property remotely whether you're on the go.
Trending Now
Updates